|
Configure RoboGEO
|
|
|
|
|

|
|
|
Program Preferences
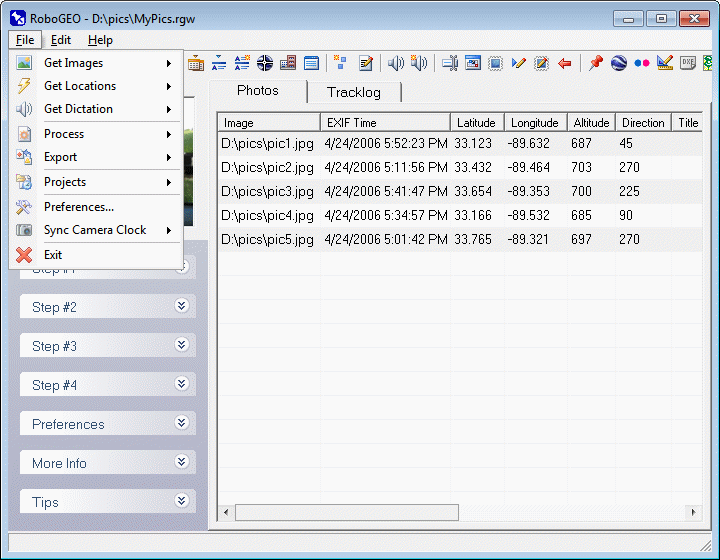
click on 'File', 'Edit' or 'Help' to navigate the documentation
|
|
|
|
|
Selecting this option loads the Preferences screen where you can specify various program settings. The items listed are either those that apply globally or those that cannot be specified elsewhere. To set an option in the RoboGEO preferences, select it from the tree view and then enter the new value into the 'Current Value' box. Click the 'Save' button to save it. If an item requires a True/False value, select the appropriate option. Other items require that you type a value directly into the textbox. Some items, such as the Datum, require an additional input form - double click on the 'Current Value' box to load it. If the field is a URL or media file, double clicking on it will load it into the associated program. You can save your current configuration by selecting 'Save' under the Preference's 'File' pull-down menu. By default, saved config files have an RCF (RoboGEO Config File) file extension. Note that the program only saves those values that differ from the default values. Some settings specify file paths and some of those are dependent on the location of the RoboGEO installation folder or dependent on the Windows user's Documents folder. For example, on your computer the StampLogoFilePath setting may be C:\Program Files\RoboGEO\YourLogo.png. If you exported a config file and then tried to load it on a computer where the installation folder was D:\RoboGEO\, the C:\Program Files\RoboGEO\YourLogo.png path would not exist. For that reason, if a option's configured path does not exist, the program will look for it in a list of predefined locations as documented for that specific option. In the example above, after not finding YourLogo.png in C:\Program Files\RoboGEO\YourLogo.png, the program would then look for it in D:\RoboGEO\. There are 3 ways you can open a previously saved RCF file. The 1st is by loading a local file by selecting the 'File->Open->Local File' pull-down menu option. The next way is to load it from the web by selecting the 'File->Open->From the Web' pull-down menu option. You may need to load it from the web if you're part of a team that must use a common config file. The 3rd way is to load it (either a local file or a URL) from the roboge.exe command line. Since saved RCF files only contain the preference items that differ from their default values, you may need to reset your preference settings to the default values before loading the RCF file. You can reset all of your preference settings to the default values by selecting the Preference's 'File->Reset' pull-down menu. Note you can also do this by passing /DEFAULTS on the robogeo.exe's command line. You can specify the URL associated with the Preferences form's Help button by setting PreferencesHelpButtonUrl and you can display a custom message when the form loads by setting PreferencesMessageAtStartup. Using these 2 settings along with the program's ability to load a config file from a URL allows you to coordinate and communicate with multiple users who must share the same program settings. UseOnlineHelpIf True, the program will use the online help system instead of the local (CHM) help system. The default is to use local help. EditOriginalImages
If True, the program will overwrite the existing images when they're processed.
BackupOriginalImagesIf both this and EditOriginalImages are True, the original images will be backed up to a new folder under \My Documents\RoboGEO\Backup\ before they are processed. The name of the new folder will be based on the current time and will be of the form yyyymmddhhmmss. For example, if the time is 4:49:01am on December 31, 2007, the new folder will be named \My Documents\RoboGEO\Backup\20071231044901\. JpgQuality
Specify the image quality to use when saving JPG files. This can range from 1 (lowest quality, highest compression, smallest file size) to 100 (highest quality, lowest compression, largest file size).
Datum
Specify the datum. The datum that you select should be the same as your GPS unit and/or the same datum that's associated with the tracklog files that you import. Select WGS 1984 if you're unsure.
AltitudeIsFeet
If True, altitudes are expressed in feet. Otherwise, meters are used. The units are used for display purposes only, like when stamping images or displaying trackpoint statistics. Altitudes are always written as meters when saved to the EXIF headers, regardless of what is specified here, because that's what the EXIF specification requires.
CoordinateFormatThe program will display location values in this format. DEGREES will use decimal degrees and MGRS will use the Military Grid Reference System. Note that the 'Images -> Stamping -> Footer -> StampLatLonFormat' setting controls the coordinate format when stamping images. You'll need to restart the program for the change to take effect. CameraOffset
You can automatically determine this value by selecting the 'Camera Clock' option under the 'File' pull-down menu.
UtcTimeBias
You can automatically determine this value by selecting the 'Camera Clock' option under the 'File' pull-down menu.
CmdLineAutoModePlayWav
Specify the local path to a WAV sound file. If robogeo.exe is started in automode by using the /a command line parameter, the sound file will be played at program startup. You can double-click on the file path in the associated text box to preview the sound.
CmdLineAutoModePromptIf True and if robogeo.exe is started in automode by using the /a command line parameter, you'll be prompted at program startup whether to cancel the execution of the other command line parameters. This prompt occurs after the WAV file is played. CmdLineAutoModeLogFilePath
Specify a file path to an ASCII text file. When the program is started in automode by using the /a command line parameter, status information and/or errors are written to this file instead of being displayed to the user. The file is created if it doesn't currently exist.
CmdLineAutoModeLogFileArchiveIf True and if the log file size exceeds what's specified in CmdLineAutoModeLogFileArchiveSize, it will be renamed to a dated format (YYYYMMDDHHMMSS with an extension that matches the original log file name), compressed, and then added to an archive named LogArchive.zip located in the same folder as the original log file. Once added, the original log file will be deleted. CmdLineAutoModeLogFileArchiveSizeSpecify a number between 65536 and 2147483647. When the log file size (in bytes) exceeds this number, it'll be archived per CmdLineAutoModeLogFileArchive. CmdLineAutoModeLaunchGoogleEarthIf True and if exporting to Google Earth (/g) in automode (/a), the generated KML or KMZ file will be launched in Google Earth upon completion. CmdLineAutoModeLaunchGoogleMapsIf True and if exporting to Google Maps (/m) in automode (/a), the folder containing the generated files will be launched in Windows Explorer upon completion. CmdLineAutoModeLaunchShapefileIf True and if exporting a Shapefile (/h) in automode (/a), the folder containing the generated files will be launched in Windows Explorer upon completion. CmdLineAutoModeLaunchDxfFileIf True and if exporting a DXF file (/c) in automode (/a), the generated DXF file will be launched in the Windows program associated with the .DXF file extension upon completion. CmdLineAutoModeLaunchMapPointFileIf True and if exporting a CSV file for MapPoint (/b) in automode (/a), the generated CSV file will be launched in the Windows program associated with the .CSV file extension upon completion. Note that MapPoint isn't usually associated with .CSV files - that's usually a spreadsheet program. CmdLineAutoModeLaunchGpxFileIf True and if exporting a GPX file (/b) in automode (/a), it will be launched in the Windows program associated with that file extension upon completion. CmdLineAutoModeLaunchHtmlFolderIf True and if exporting HTML (/w) in auto mode (/a), the folder to which the HTML files were exported will be launched in the associated Windows program upon completion. The default is False. CmdLineAutoModeRemoveUngeocodedIf True when running in auto mode (/a), ungeocoded images will be automatically removed from the selected image list and the requested operation will proceed. If False, the default, the operation will abort. CmdLineImgLoadGeocoder
When only an image path is passed on the robogeo.exe command line, the image is loaded and added to the grid just as if you selected it from the pull-down menu. In addition to that and if this is set to True, the Google Earth geocoder will load and allow you to quickly (manually) geocode the image.
CmdLineTracklogExportGoogleEarth
When only a tracklog file is passed on the robogeo.exe command line, the tracklog is loaded just as if you selected it from the pull-down menu. In addition to that and if this is set to True, it'll also be loaded in Google Earth, allowing you to quickly view it.
CmdLineTracklogExportGoogleEarthThenEndIf just a tracklog is passed on the command line and if CmdLineTracklogExportGoogleEarth is True, robogeo.exe will automatically end after it launches it. CmdLineCmdLineDotTxtUse
If this is True and if CmdLine.txt exists in the same folder as robogeo.exe, the contents of that file will be used for robogeo.exe's command line. If something is also specified on the command line, it'll be ignored, i.e. CmdLine.txt overrides what may exist on the command line.
CmdLineCmdLineDotTxtDeleteAfterUseIf True, Cmdline.txt is deleted after it's used. You should usually do this if you're using a 3rd party application to dynamically create the file. AutoStartDelCmdLineDotTxtIf True, Cmdline.txt is deleted at program startup. AutoStartLaunchApp
If specified and if it represents a local file path to an application, the application is launched at program startup. What robogeo.exe does after it launches the application depends on what you specify for AutoStartWaitForAppEnd, AutoStartWaitForCmdLineDotTxtExist, and AutoStartWaitTimeOut.
AutoStartWaitForAppEndIf the application associated with AutoStartLaunchApp is launched at program startup, robogeo.exe will resume either when the application ends or when there's a timeout. AutoStartWaitForCmdLineDotTxtExistIf the application associated with AutoStartLaunchApp is launched at program startup, robogeo.exe will resume either when this file path exists (such as c:\robogeo\CmdLine.txt) or when there's a timeout. AutoStartWaitTimeOutIf the application associated with AutoStartLaunchApp is launched at program startup, robogeo.exe will resume if the application has not ended in this amount of time. The number is expressed in seconds. If you specify -1, the program will wait indefinitely for the program to end. AutoEndLaunchApp
If specified and if it represents a local file path to an application, the application is launched asynchronously before the program ends.
IsSpeedy
If True, some of the visual effects associated with the user interface will be turned off, which may speed up the application on slower computers.
MainFormForceWidthIf both this and MainFormForceHeight are non-zero and valid for your screen size, the main form's width will be set to this many pixels. Set this to 1280 and MainFormForceHeight to 720 to force HD mode. MainFormForceHeightIf both this and MainFormForceWidth are non-zero and valid for your screen size, the main form's height will be set to this many pixels. Set this to 720 and MainFormForceWidth to 1280 to force HD mode. GridInputLatLonFormat
This is the required format when typing latitude and longitude values directly into the grid. It does not apply when entering values via the 'Edit' pull-down menu - only when typing directly into the grid.
GridRowHeightSpecify the height, in pixels, of the grid rows. The default value is 18. GridFontSizeSpecify the grid font height in points. Depending on the font, the actual font size may differ from what you specify here. The default is 8. GridFontFaceSpecify the grid font face. The font must exist on your system. The default is MS Sans Serif. FolderPickerShowFilesIf True, the folder picker dialog will show files in addition to folders. The default is False. PreferencesHelpButtonUrlIf specified, this URL is launched when the 'Help' button is pressed on the Preferences screen. If blank, the program's normal help file will be loaded. PreferencesMessageAtStartupIf specified, this text is displayed when the preferences screen loads. UseMilitaryTimeZonesIf True, military style time zone descriptions will be used on the camera clock form and, additionally, when a military time zone is selected, the associated time zone designator will be written to the StampUseMilitaryTimeDesignator preference setting. ForceStepOneExpandedIf True, the Step #1 node in the task pane will be automatically expanded and all of the other ones will be closed. IncludeEditTimestampsReminderIf True, a reminder to correct the photo timestamps will be including in the taskpane under Step #3. PreserveImageDiskDatesIf True, image disk dates are preserved when data is written to the EXIF, when stamped, when auto-rotated, or when they are renamed. Otherwise, the image disk date reflects the date when the image was last modified. The default value is False. StampTitleIf True and if an image title exists, it's stamped at the top of the image. The header font size is automatically determined so that the title is as wide as possible without exceeding the image width and without being taller than 3.25% of the overall image height. StampTitleUseIptcHeadlineWhen stamping images if both this and StampTitle are True, the program will use the IPTC headline for the header text instead of the EXIF title. StampTitleFontFaceSpecify the header font face for stamped images. The font should be a TrueType and must be installed on your system. The default is Arial. StampTitleFontSizeSpecify the header font size. If you enter 0 (the default), the program will automatically determine the optimal size so that the width is as wide as possible without exceeding the image width, but never being taller than what's specified by StampTitleFontSizePercentage of the overall image height. StampTitleFontSizePercentageWhen StampTitleFontSize is 0, the program will automatically calculate the font size so that it's as wide as possible without being more than this percentage taller than the image's total height. The default is 3.25. StampTitleFontBoldWhen True, a bold font will be used for the header. Note that making a font bold also makes it wider. StampTitleFontColorSpecify header's 24-bit long font color. This ranges from 0 (black) to 16777216 (white). The default value (12632256 = gray) corresponds to RGB(128, 128, 128). Red is 255. Green is 65280, yellow is 65535, blue is 16711680, etc. StampTitleFontOpacitySpecify the header font opacity. This should be a whole number between 0 (invisible) and 255 (totally solid). StampTitleBackgroundBrightnessThis controls the brightness of the header text background and it should range between -100 (solid black) and 100 (solid white). Numbers in between those, like 0, result in a partially transparent background. StampLatLonFormat
Specify the latitude/longitude format to use when stamping images.
StampMgrsPrecisionMGRS precision. 1 is 10km, 2 is 1km, 3 is 100m, 4 is 10m, and 5 is 1m. StampUseMilitaryTimeConvertedToUtcWhen stamping images if both this and StampUseMilitaryTime are True, the timestamps from the camera will be converted to UTC time before they're stamped onto the images. This should be set to False if the camera's clock is already set to UTC time. StampMgrsNoSpacesIf True no spaces will be included in the MGRS coordinates. Set to False if you want to include as space between the various components, i.e. grid zone designator <space> 100,000 meter square identifier <space> easting value <space> northing value. StampUtmDecimalPlacesThe number of truncated decimal places in a UTM coordinate's easting and northing values. StampUtmLatitudeBandDesignatorType
Specify the format of the latitude band designator to use when stamping images. The latitude band designator is the letter that appears after the UTM zone number.
StampUtmUnitsIsFeetIf this is True and if StampLatLonFormat is set the UTM, the UTM northing and easting values will be expressed in feet instead of meters. The type of feet is per the StampUtmFeetIsUsaFeet setting. The default is False (they're expressed in meters). StampUtmFeetIsUsaFeetIf both this and StampUtmUnitsIsFeet are True, U.S. Survey feet (1 meter = 3.28083333333333) are used instead of International feet (1 meter = 3.28083989501312 feet) when converting from meters. StampFontFaceSpecify the footer font face for stamped images. The font should be a TrueType and must be installed on your system. The default is Arial. StampFontSizeSpecify the footer font size. If you enter 0 (the default), the program will automatically determine the optimal size so that the width is as wide as possible without exceeding the image width, but never being taller than what's specified by StampFontSizePercentage of the overall image height. StampFontSizePercentageWhen StampFontSize is 0, the program will automatically calculate the font size so that it's as wide as possible without being more than this percentage taller than the image's total height. The default is 3.25. StampFontBoldWhen True, a bold font will be used for the footer. Note that making a font bold also makes it wider. StampFontColorSpecify the footer's 24-bit long font color. This ranges from 0 (black) to 16777216 (white). The default value (12632256 = gray) corresponds to RGB(128, 128, 128). Red is 255. Green is 65280, yellow is 65535, blue is 16711680, etc. StampFontOpacitySpecify the footer font opacity. This should be a whole number between 0 (invisible) and 255 (totally solid). StampBackgroundBrightnessThis controls the brightness of the footer text background and it should range between -100 (solid black) and 100 (solid white). Numbers in between those, like 0, result in a partially transparent background. StampIncreaseCanvasHeightWhen stamping location data in the image footer, the default method is to place it directly on top of the image. This causes a small amount of the image to be obscured by the text. If you set this option to True, the image's canvas height will be increased by the required amount so that the text can be stamped into the newly exposed area. This results in none of the raster data being obscured by the text. StampIncreaseCanvasColorIf StampIncreaseCanvasHeight is True, the color of the newly exposed canvas will be set to this. This will become, in effect, the background color for the stamped footer text. 0 (black) is the default. StampOmitDateIf True, the image date is not included in the footer when stamping. Use this if the date isn't important or if you're running out of horizontal space on the image. StampOmitUtcOffsetIf True, the UTC offset is not included in the footer as part of the timestamp when stamping. StampOmitTimeIf True, the timestamp that's used when stamping is per your computer system's Short Date format instead of the Long Date format, i.e. no time component will be included on the image, only the date. The UTC Offset will also also omitted. StampOmitAltitudeIf True, the altitude is not included in the footer when stamping. StampOmitDirectionIf True and if it exists for the image, the direction is not included in the footer when stamping. StampOmitDatumIf True, the map datum is not included in the footer when stamping. StampUseConfiguredDatumIf True, the value that you've specified for the Datum setting will be used when stamping images. If False the Datum setting will be ignored and whatever currently exists in the EXIF's datum field will be used. The default value is False. StampUseCardinalDirectionsWhen True and when stamping images, cardinal directions (N, NNE, NE, ENE, etc.) are used in the footer instead of decimal degrees measured clockwise from true north. StampMinutesDecimalPlacesWhen stamping images with degrees-minutes format (DM), this many decimal places will be used for the minutes. StampElapsedTimeWhen True and when stamping images, the elapsed time relative to the earliest image will be stamped on the image footer instead of the image's local timestamp. StampElapsedTimeWordWhen StampElapsedTime is True and when stamping images, this word is placed after the elapsed time. The default word is "Elapsed". StampUseDateAndTotIf True and when stamping images, the date and time will be stamped in a format similar to 'Date: 23SEP08 TOT: 1615Z' instead of using the long date format associated with your computer's regional settings. It's assumed that the camera's clock is set to the local time, so the time is converted to UTC time before stamping. StampUseMilitaryTimeIf True and when stamping images, the date and time will be stamped in a format similar to '0335:49Z 06JAN2011' instead of using the long date format associated with your computer's regional settings. It's assumed that the camera's clock is already set to UTC time, so the time is used verbatim and not converted before stamping. If you want to override this and also convert to UTC time, set StampUseMilitaryTimeConvertedToUtc to True StampUseDateAndTotTimeDesignatorIf StampUseDateAndTot is True when stamping images, this is appended to the end of the timestamp. The default is Z. StampUseMilitaryTimeDesignatorIf StampUseMilitaryTime is True when stamping images, this value, if any, is appended to the end of the time portion of the timestamp, but before the date. If this value is Z, the resulting timestamp would look similar to 0809:19Z 18JAN2011. StampPrefixIf specified when stamping images, this text will be included to the left of the stamped footer text. If StampPrefixPrompt is also True, this text will be used for the associated prompt's default value. StampPrefixPromptIf True when stamping images, you'll be prompted for text to include at the beginning of the footer text. If StampPrefixPromptText is also specified, it'll be used for the prompt text. If StampPrefix is also specified, it'll be used for the default value. StampPrefixPromptTextWhen stamping images and if StampPrefixPrompt is True, this is the text that will be presented to the user when prompting for the text to stamp to the left of the footer text. StampSuffixIf specified when stamping images, this text will be included to the right of the stamped footer text. If StampSuffixPrompt is also True, this text will be used for the associated prompt's default value. StampSuffixPromptIf True when stamping images, you'll be prompted for text to include at the end of the footer text. If StampSuffixPromptText is also specified, it'll be used for the prompt text. If StampSuffix is also specified, it'll be used for the default value. StampSuffixPromptTextWhen stamping images and if StampSuffixPrompt is True, this is the text that will be presented to the user when prompting for the text to stamp to the left of the footer text. StampLeftRightJustifiedIf True when stamping images, the footer text, except for the timestamp, will be left justified. The timestamp will be right justified. The text in the middle, if it exists, will be centered between the two. StampLeftRightJustifiedTitleInMiddleIf both this and StampLeftRightJustified are True when stamping images, the image title, if it exists, will be centered between the left and right justified components. StampPreprocessorApplicationPath
Before an image is stamped and if specified, this application will be launched with the current image path passed as a command line parameter to it. Whether RoboGEO waits for the application to terminate before continuing depends on the StampPreprocessorApplicationWaitForEnd setting.
StampPreprocessorApplicationWaitForEndIf True and if StampPreprocessorApplicationPath is specified, RoboGEO will wait for the launched application to terminate before continuing. Otherwise, the program is launched asynchronously. StampPreprocessorApplicationTimeOutIf StampPreprocessorApplicationPath is specified and if StampPreprocessorApplicationWaitForEnd is True, this is the maximum amount of time (in seconds) RoboGEO will wait on the launched program to terminate. If -1, the wait will be indefinite. StampPostprocessorApplicationPath
After an image is stamped and if specified, this application will be launched with the current image path passed as a command line parameter to it. Whether RoboGEO waits for the application to terminate before continuing depends on the StampPostprocessorApplicationWaitForEnd setting.
StampPostprocessorApplicationWaitForEndIf True and if StampPostprocessorApplicationPath is specified, RoboGEO will wait for the launched application to terminate before continuing. Otherwise, the program is launched asynchronously. StampPostprocessorApplicationTimeOutIf StampPostprocessorApplicationPath is specified and if StampPostprocessorApplicationWaitForEnd is True, this is the maximum amount of time (in seconds) RoboGEO will wait on the launched program to terminate. If -1, the wait will be indefinite. StampLogoIf this is True when stamping images, the logo specified by StampLogoFilePath will be stamped onto each image. StampIptcEditorPromptIf True when stamping images, you'll be prompted whether to load the IPTC editor so you can specify IPTC data before stamping begins. StampLogoFilePath
If StampLogo is True when stamping images, this logo will be stamped onto each image. If blank (the default), the program will look for and use Logo.png if it exists in the same folder as robogeo.exe.
StampLogoSizePercentWhen stamping images and if StampLogo is True, the logo specified by StampLogoFilePath will be resized so that it's this percentage of the image's width or height, whichever is greater. If 0, the logo will not be resized. StampLogoXWhen a logo is stamped onto an image, the left side of the logo will be located this many pixels from the left hand side of the image. If the value you specify causes any part of the logo to fall outside of the image's area, the logo will be cropped. The dafault value is 0 for both this and StampLogoY - that will position the logo in the image's upper left corner. StampLogoYWhen a logo is stamped onto an image, the top of the logo will be located this many pixels from the top of the image. If the value you specify causes any part of the logo to fall outside of the image's area, the logo will be cropped. The dafault value is 0 for both this and StampLogoX - that will position the logo in the image's upper left corner. StampLogoOpacityWhen a logo is stamped onto an image, this is used for the logo's opacity. This can range from 1 (fully transparent or invisible) to 255 (fully opaque or solid). The default is 255. StampLogoFeatherWhen a logo is stamped onto an image, this is used for the logo's feathering. Feathering allows the merged logo to appear as if it blends into the image instead of there being a sharp edge around it. It's expressed in pixels and is the width of the feathering. It can range from 0 to 250. The default is 0 (no feathering). StampIptcLocationWhen stamping an image, if this is True and if IPTC location data (city, state/province, and/or country) exists in the image, the IPTC data will be extracted and stamped onto the image above where the lat/lon location data is stamped. StampIptcLocationWordWhen stamping an image and if StampIptcLocation is True, this is used as the label for the location stamp. The default is 'Location'. If, for example, you specified 'Photo Location' for this option, the resulting image stamp may look something like 'Photo Location: Sunrise, FL USA'. StampIptcLocationIncludeCountryIf this and StampIptcLocation are both True, the country will be included in the IPTC location stamp. StampIptcLocationUseCountryAbbreviationIf this, StampIptcLocation, and StampIptcLocationIncludeCountry are all True, the country abbreviation will be included in the IPTC location stamp. StampIptcLocationIncludeStateIf this, StampIptcLocation, and StampIptcLocationIncludeState are all True, the state abbreviation will be included in the IPTC location stamp. StampIptcLocationUseStateAbbreviationIf this, StampIptcLocation, and StampIptcLocationIncludeState are all True, the state abbreviation will be included in the IPTC location stamp. If the abbreviation cannot be automatically determined, the full state name will be included. Currently, only state/province abbreviations for the USA, Canada, and Australia are supported. StampIptcLocationIncludeCityIf this and StampIptcLocation are both True, the city will be included in the IPTC location stamp. StampIptcSubLocationWhen stamping an image and if StampIptcSubLocation is True, this is used as the label for the sub-location stamp. StampIptcSubLocationWordWhen stamping an image and if StampIptcSubLocation is True, this is used as the label for the sub-location stamp. The default value is 'Object'. If you specified, for example, 'Neighborhood' for this option, the resulting string would look similar to 'Neighborhood: Whispy Pines Subdivision'. StampNorthArrowPrompt
If True when stamping images, you'll be prompted whether to load an interactive form that allows you to specify north arrows to stamp onto each image.
StampNorthArrowPath
If StampNorthArrowPrompt is True and if you select Yes to the resulting prompt, the graphic specified by this path will be used for the north arrow. If blank (the default), the program will use the supplied NorthArrow.png graphic located in the same folder as robogeo.exe.
StampNorthArrowPercentSize
If StampNorthArrowPrompt is True and if you select Yes to the resulting prompt, the graphic specified by StampNorthArrowPath will be resized so it's this percentage of the image's width or height, whichever is greater.
StampNorthArrowLeftWhen stamping a north arrow onto an image, it will be positioned this many pixels from the image's left hand side. If this value exceeds the image's width, it'll be automatically adjusted so that the north arrow's right side aligns with the image's right side. StampNorthArrowTop
When stamping a north arrow onto an image, it will be positioned this many pixels from the image's top. If this value exceeds the image's height, it'll be automatically adjusted so that the north arrow's bottom aligns with the image's bottom.
StampNorthArrowOpacitySpecify the north arrow graphic's opacity. This should be a whole number between 0 (invisible) and 255 (totally solid). StampNorthArrowFeatherWhen a north arrow is stamped onto an image, this is used for the feathering. Feathering allows the merged north arrow to appear as if it blends into the image instead of there being a sharp edge around it. It's expressed in pixels and is the width of the feathering. It can range from 0 to 250. The default is 0 (no feathering). ExifWriteSoftwareFieldIf False, the program will not update the EXIF Software field whenever it updates the EXIF data. ExifWriteGpsTimeAndDateFieldsIf False, the program will not update the EXIF GPS Date and GPS Time fields whenever it updates the EXIF data. The default is True which will update these two fields whenever the GPS data is changed. ExifCopyrightNotice
When this is specified and when other data is written to the EXIF headers, this is written to the photographer copyright notice EXIF field.
ExifCopyrightNoticeOverwriteExistingIf False (the default value), existing photographer copyright notices are never overwritten. ExifArtistCameraOwner
If specified and when writing other data to the EXIF headers, this value is used to construct the EXIF Artist field. Normally, you should also specify the ExifArtistPhotographer and ExifArtistImageCreator fields in conjunction with this.
ExifArtistPhotographer
If specified and when writing other data to the EXIF headers, this value is used to construct the EXIF Artist field. Normally, you should also specify the ExifArtistCameraOwner and ExifArtistImageCreator fields in conjunction with this.
ExifArtistImageCreator
If specified and when writing other data to the EXIF headers, this value is used to construct the EXIF Artist field. Normally, you should also specify the ExifArtistCameraOwner and ExifArtistPhotographer fields in conjunction with this.
MagneticDeclination
For your location, this is the difference between magnetic and true north. East values should be positive, west negative.
UseDiskDateAsTimeStampIf True, the program will use the image disk date as the timestamp instead of trying to determine it from the EXIF headers. This is useful for webcams or older cameras that don't produce EXIF compliant images. ExifMaxGpsCompatibility
If True, the program writes latitude and longitude values to the EXIF with a precision of 2 decimal places on the minutes. This results in a maximum error of 0.005 minutes, but it ensures compatibility with almost all 3rd party EXIF reader programs. If False (the default), the latitude and longitude values are written to the EXIF with exact precision.
ForceFileNameAsImageTitleIf True and if ForceFileNameWithoutExtensionAsImageTitle is False, when an image is loaded the EXIF image title is set to the image's file name and is used for any subsequent processing. You may want to do this if your camera automatically sets the title to the make/model of the camera or if it sets it to an arbitrary string. The default is False. ForceFileNameWithoutExtensionAsImageTitleIf True, when an image is loaded the EXIF image title is set to the image's file name without the extension and is used for any subsequent processing. You may want to do this if you use the EXIF titles for descriptive purposes. The default is False. ForceTextAsImageTitleIf not empty, when an image is loaded the EXIF image title is set to what you specify here and is used for any subsequent processing. You may want to do this if your camera automatically sets the title to the make/model of the camera or if it sets it to an arbitrary string. The default is blank. WriteImageTitleToExifTitleIf this is True when writing data to the EXIF, the image title, if it exists, will be written to the EXIF title field. WriteImageTitleToIptcHeadlineIf this is True when writing data to the EXIF, the image title, if it exists, will be written to the IPTC headline field. WriteImageDescriptionToExifDescriptionIf this is True when writing data to the EXIF, the image description, if it exists, will be written to the EXIF description field. WriteImageDescriptionToIptcCaptionAbstractIf this is True when writing data to the EXIF, the image description, if it exists, will be written to the IPTC caption/abstract field. UseExifGpsDestLocationsIf True, an image's latitude and longitude data will be read from and written to the EXIF's GPS destination fields instead of the normal EXIF location fields. This adds compatibility for some GPS cameras like the ikeGPS. UseExifGpsBearingDirectionsIf True, an image's direction will be read from and written to the EXIF's GPS bearing direction field instead of the normal EXIF direction field. This adds compatibility for some GPS cameras like the ikeGPS. ApplyRelativeDirectionsToTracklogHeadingIf True, when applying relative directions to images that have existing directional information and when a tracklog is loaded, the relative direction will be applied to the computed tracklog heading instead of it being applied to image's existing directional information. Normally, this should be False so that the image's directional information takes precedence over what may be computed from a tracklog. Note that you can accomplish the same thing by selecting the 'Edit Direction' option under the 'Edit' pull-down menu instead of using this setting and typing directly into the grid. PromptToEditTimestampsAfterGeocodingIf this option is True after geocoding images without error, you'll be prompted whether to update each image's EXIF timestamp to account for the current CameraOffset and/or UtcTimeBias value. Once applied to the image timestamps and if you chose to do so, CameraOffset will be reset to 0 and UtcTimeBias will be reset to the new value you selected. These changes are always applied to your original images, regardless of the EditOriginalImages setting. You can also perfrom this operation via the 'Edit' pull-down menu. WarnIfExifDateIsJanFirstAfter loading images, you'll be warned if any image has an EXIF date of January 1st. WarnIfExifDateIsOneYearPastAfter loading images, you'll be warned if any image has an EXIF date that's more than 1 year old. ExifPreprocessorApplicationPath
Before data is written to the EXIF and if specified, this application will be launched with the current image path passed as a command line parameter to it. Whether RoboGEO waits for the application to terminate before continuing depends on the ExifPreprocessorApplicationWaitForEnd setting.
ExifPreprocessorApplicationWaitForEndIf True and if ExifPreprocessorApplicationPath is specified, RoboGEO will wait for the launched application to terminate before continuing. Otherwise, the program is launched asynchronously. ExifPreprocessorApplicationTimeOutIf ExifPreprocessorApplicationPath is specified and if ExifPreprocessorApplicationWaitForEnd is True, this is the maximum amount of time (in seconds) RoboGEO will wait on the launched program to terminate. If -1, the wait will be indefinite. ExifPostprocessorApplicationPath
After data is written to the EXIF and if specified, this application will be launched with the current image path passed as a command line parameter to it. Whether RoboGEO waits for the application to terminate before continuing depends on the ExifPostprocessorApplicationWaitForEnd setting.
ExifPostprocessorApplicationWaitForEndIf True and if ExifPostprocessorApplicationPath is specified, RoboGEO will wait for the launched application to terminate before continuing. Otherwise, the program is launched asynchronously. ExifPostprocessorApplicationTimeOutIf ExifPostprocessorApplicationPath is specified and if ExifPostprocessorApplicationWaitForEnd is True, this is the maximum amount of time (in seconds) RoboGEO will wait on the launched program to terminate. If -1, the wait will be indefinite. TitleMakerCaption1This phrase will be used for the caption of the 1st input field on the Title Maker form. TitleMakerCaption2This phrase will be used for the caption of the 2nd input field on the Title Maker form. TitleMakerCaption3This phrase will be used for the caption of the 3rd input field on the Title Maker form. TitleMakerDelimiterIf more than one of the title parts are specified on the Title Maker form, this value will be inserted between the part(s). TitleMakerThumbnailWidthThis is the width, in pixels of the thumbnail preview on the Title Maker form. TitleMakerThumbnailHeightThis is the height, in pixels of the thumbnail preview on the Title Maker form. AlwaysRenameOriginalIf True, the program always renames the original images regardless of the EditOriginalImages setting. PromptForKmlPolygonFileIf True, you'll be prompted to load a KML polygon file when the applicable form loads. If False, you'll have to load the KML polygon file from the resulting form. You may want to do this if you simply want to type the renamed values directly into the grid without relying on the polygons. AlwaysRedateOriginalIf True, the program always redates the original images regardless of the EditOriginalImages setting. RotateWhenLoaded
If True and if orientation information exists in the EXIF headers, images will be automatically rotated when loaded and the EXIF Orientation field will be reset to 1. The process is entirely lossless.
PromptBeforeRotatingIf both this and RotateWhenLoaded are True, you'll be prompted whether to rotate images prior to loading them. KeepImageDirAfterProjecting
The direction in which an image is projected is per the photo's direction. It's presumed that when you project a photo location that the new location represents the true location of the photo's subject, making the photo direction value obsolete.
RemoveImageAltitudeAfterProjecting
If True, the image altitude will be removed after projecting the image. The default value is True.
LocateWorldMapUrlIf specified, this URL will be launched when the Edit-->Locate-->World Map menu option is chosen. If the URL contains the bracketed terms [lat] or [lon], the program will automatically insert the current image's true values for them. For example, your URL may look like http://www.yourmap.com/script.php?lat=[lat]&lon=[lon]. Leave this setting blank (the default) to use the default world map provider. LatLonFinderUrlQueryStringIf specified and if the selected image doesn't already have latitude and longitude values associated with it, this ampersand delimited string of name=value pairs is appended to the end of the URL (http://www.robogeo.com/latlonfinder/map.asp) associated with the 'Lookup Lat/Lon Values' option under the 'Edit' pull-down menu. This allows you to specify the default 'view' (normal, satellite, hybrid, physical), 'zoom' (1 to 15), 'lat' (-90 to 90), and/or 'lon' (-180 to 180). For example if you want the terrain view to be the default, specify (without the quotes) 'view=terrain'. If you want a hybrid view with a zoom value of 10, specify 'view=hybrid&zoom=10' (note the ampersand). Do not include a leading question mark. LaunchImageFolderIf True, when you double click on a thumbnail, the image's folder will be loaded into Windows Explorer instead of the full-size image opening in the graphics program associated with the image's file extension. The default is False. LaunchImageWithDifferentExtensionWhen you double click on a thumbnail and if this file extension is specified, the extension replaces the image's current extension and the resulting file path is opened in the program associated with that extension. The default is blank so that the full size image opens in your normal graphics program. Do not include a leading period. For example, if you specify 'XMP' for this option and if you double click on an image with the name 'MyImage.JPG', the program will try to load 'MyImage.XMP' into the Windows program that's associated with the XMP file extension. LaunchApplication
If this file path is specified, when you double click on a thumbnail image, this application will launch instead of the image being loaded into your normal graphics program. Do not enclose the path in quotes. The default is blank.
LaunchApplicationWithImageAsParameterIf True and if LaunchApplication is specified, when you double click on a thumbnail image, this application will load and the associated image's file path will be passed as a command line parameter to it. Do not enclose the path in quotes. The default is blank. SkipPreviouslyGeocodedPhotos
When True and when geocoding images from a tracklog, previously geocoded images will be skipped. The default value is False.
UseClosestTrackPoint
If True and if the program is unable to geocode an image normally from a tracklog, the closest trackpoint will be used for the photo location. The closest trackpoint is the one with a timestamp that is the closest to the image timestamp.
CombineTracklogSegments
If True, all of the tracklog segments will be combined into one before being used for geocoding photos.
PhotoDirFromTracklog
If True and if geocoding images from a tracklog, the image direction will be set to the current tracklog heading. Headings are measured clockwise from North.
PhotoDirFromTracklogOffset
If PhotoDirFromTracklog is True and if geocoding images from a tracklog, this number is added to the tracklog heading to determine the photo direction.
MaxJtrTimeDifferenceWhen geocoding photos from an imported JTR file, if the time difference between an image and the closest trackpoint exceeds this values, the image will be skipped and not geocoded. The number is expressed in seconds. If you specify -1, the time difference will be ignored. MaxTracklogTimeDifferenceWhen geocoding photos from a tracklog, if the time difference between an image and the closest trackpoint exceeds this value, the image will be skipped and not geocoded. The number is expressed in seconds. If you specify -1 (the default), the time difference will be ignored. ImportCsvAsCapCsvIf True, imported CSV files will be treated as if they were generated from the 'Template Work Sheet' that's associated with the 'CAP Image Processor' instead of being treated as generic CSV files. WaypointImageMaxTimeDifferenceWhen geocoding photos from waypoints in an imported GPX file, the photos are matched to the waypoint having a timestamp that's closest to the photo's EXIF timestamp if the time difference is less than this number, specified in seconds. If you specify -1 (the default) the difference is ignored. SetImageTitleToWaypointNameIf this is True when geocoding images from waypoints and if the waypoint name is not blank, the waypoint name will be used for the image title. Image titles are written to the EXIF per these options. SetImageTitleToWaypointCommentIf this is True when geocoding images from waypoints and if the waypoint comment is not blank, the waypoint comment will be used for the image title. This setting is ignored if SetImageTitleToWaypointName is True. SetImageDescriptionToWaypointNameIf this is True when geocoding images from waypoints and if the waypoint name is not blank, the waypoint name will be used for the image description. SetImageDescriptionToWaypointCommentIf this is True when geocoding images from waypoints and if the waypoint comment is not blank, the waypoint comment will be used for the image description. This setting is ignored if SetImageDescriptionToWaypointName is True. WaypointIdentifierMaxLengthEnter the maximum number of characters that your Garmin GPS supports for waypoint identifiers. When uploading waypoints, you'll be warned if any of the waypoint name lenghts exceed this number. WaypointIdentifierSymbolEnter the Garmin Protocol waypoint symbol number. Not all Garmin units support all symbol numbers. Set this value to -1 to force the Garmin unit to use its default waypoint symbol. WaypointCommentMaxLengthEnter the maximum number of characters that your Garmin GPS supports for waypoint comments. When uploading waypoints, you'll be warned if any of the waypoint comment lenghts exceed this number. WaypointCommentUseDateWhen uploading waypoints, if this is True the program will automatically create waypoint comments based on the photo's EXIF timestamp. These timestamps are for human eyes only and cannot be used by any program that's fully compliant with the Garmin Protocol. Set this to False if you want to manually enter the comments or if you want to leave them blank. PlaceLookupFormOnTopIf True, the 'Place Lookup' form will stay on top of all other windows. PlaceLookupMaxResultsWhen looking up places, this is the maximum number of records that will be returned. The default is 100, but the actual number can be as high as 1000. Each record will be about 700 bytes so, depending on the speed of your internet connection, 1000 records may take a long time to download. PlaceLookupSearchRadiusWhen you double click on a place lookup result, you can search for places near the current one. The number that you specify here (in km) is the radius of that search. GeonamesUserNameBefore using the reverse geocoder, you should register with geonames.org. When you do that, you'll be issued a user name that you can use for this option. If you use the default value (robogeo), you'll likely experience intermittent failures looking up data as the robogeo user name's account quota is exceeded. This value, if it exists, will be appended to the end of the query string of the associated URLs with the name 'username'. GeonamesUrlSearchSpecify any URL that's compatible with and can accept the same parameters as the search service at geonames.org. GeonamesUrlNearestAddressSpecify any URL that's compatible with and can accept the same parameters as the nearest address service at geonames.org. GeonamesUrlAltitudeSpecify any URL that's compatible with and can accept the same parameters as the SRTM service at geonames.org. GeonamesUrlNearbyPlacesSpecify any URL that's compatible with and can accept the same parameters as the nearby place name service at geonames.org. GpxImagePathInWaypointComment
If True, and if exporting the photo locations as a list of waypoints, the local image file path will be written to the comment field in the form file:<path>.
GpxImageTitleAsWaypointNameWhen exporting a GPX file and if this value is set to True, the image's EXIF title will be used for the waypoint name instead of the filename. GpxMemoryMapCompatibleWhen exporting a GPX file that contains photos and if this value is set to True, a <link> element with an HREF attribute that points to the image's local file path is included in the resulting GPX file. This makes the GPX file suitable for importing into Memory-Map. GpxMemoryMapIconIf GpxMemoryMapCompatible is True when exporting a GPX file, a <sym> element is added to the GPX file. The symbol value should be a Memory-Map icon name. The default value is 'Dot'. GpxMemoryMapCategoryIf GpxMemoryMapCompatible is True when exporting a GPX file, a <type> element is added to the GPX file. The type value should be a Memory-Map category name. GpxMemoryMapTrkCategoryIf GpxMemoryMapCompatible is True when exporting a GPX file that includes a tracklog, a <type> element is added to the GPX file under the <trk> element. The value that you enter should represent a broad category name. The default value is 'Track'. GpxMemoryMapTrkNameIf GpxMemoryMapCompatible is True when exporting a GPX file that includes a tracklog, a <name> element is added to the GPX file under the <trk> element. The value that you enter should represent a specific track name that falls under the category name that you specify. The default value is 'Track'. GpxMemoryMapTrkPromptIf GpxMemoryMapCompatible is True when exporting a GPX file that includes a tracklog and if this value is set to True, you'll be prompted for the GpxMemoryMapTrkCategory and GpxMemoryMapTrkName values at the time you're exporting the GPX file instead of you having to go back to the preferences area and changing it from there each time. The default value is 'False'. GpxMapSourceWaypointCompatibleIf True and if exporting a GPX file that uses the photo locations as waypoints, Garmin's GPX extension will be added to the output. This will allow you to view the associated images from within MapSource. GpxMapSourceWaypointDisplayModeIf GpxMapSourceWaypointCompatible is True and if exporting a GPX file, this setting controls how the waypoints are displayed in Garmin's MapSource program. You can specify SymbolOnly, SymbolAndName, or SymbolAndDescription. GpxMapSourceWaypointSymbolIf GpxMapSourceWaypointCompatible is True, this is used for the <sym> element in the exported GPX file. If must be something that MapSource recognizes. The default value is Waypoint. AudioAutoPlay
If True and if an image has dictation associated with it, the audio will automatically play whenever the image is selected. Normally, you'll have to click the small paperclip icon in the lower left corner of the image preview to play the associated audio file.
AudioAutoAssociateWhen True (the default) audio and image files are automatically associated when either is loaded. Set to False if you intend to manually associate the audio files to the images. AudioUseAssociatedProgramInstead of using the built-in audio player, set to True if you want to use the program on your system that's associated with the current audio format. The default value is False. AudioKeepPlayerOnTopSet to True to keep the built-in audio player on top of all other windows. AudioRewindAfterPause
If True and when resuming play after pausing, the audio will 1st rewind per the AudioRewindTime preference before resuming play.
AudioRewindTimeThe number of seconds to rewind per 1 click of the rewind button. The default value is 3 seconds. AudioImageMaxTimeDifference
Enter the maximum time (in seconds) that the image and audio times can differ.
AudioAllowUnsupportedFileTypes
If True, you'll be able to select and associate any type of file (not just audio files) with the images.
GeUsePhotoThumbnailIconsIf True, thumbnail images are used for the Google Earth icons instead of the standard camera or directional icons. This works best when there are only a few images. Otherwise, the map can become very cluttered. GeLaunchFileExtension
Newly created KML or KMZ files will be automatically launched in the program associated with the file extension you specify.
GeWaypointsOpenIf True, the waypoints node in Google Earth's left hand pane will be expanded when the KML/KMZ file is opened. The default is False. GeTracklogPathVisibleIf True, the tracklog path node in Google Earth's left hand pane will be selected when the KML/KMZ file is opened, causing the tracklog path to be visible. The default value is False if there are photos and True if there's only a tracklog. GePhotoRoutePathVisibleIf True, the photo route node in Google Earth's left hand pane will be selected when the KML/KMZ file is opened, causing the photo route to be visible. The default value is False. GeBoundingBoxVisibleIf True, the bounding box node in Google Earth's left hand pane will be selected when the KML/KMZ file is opened, causing the bounding box to be visible. The default value is False if there are photos and True if there's only a tracklog. GeTrackPointsVisibleIf True, the tracklog points node in Google Earth's left hand pane will be selected when the KML/KMZ file is opened, causing the tracklog points to be visible. The default value is False if there are photos and True if there's only a tracklog. GeKeyPointsVisibleIf True, the key points node in Google Earth's left hand pane will be selected when the KML/KMZ file is opened, causing the key points to be visible. The default value is False if there are photos and True if there's only a tracklog. GeIncludePhotoTimeLineWhen exporting to Google Earth, if this is True and if the photos have valid EXIF timestamps, a photo timeline will be included in the output. The default is False. Note that if a photo's timestamp does not fall within the range of the current Google Earth timeline, the photo will not have an icon on the map. You'll need to adjust the timeline range to see all of the photo icons. This may be confusing to others who view your KML files. GeIncludeTracklogTimeLineWhen exporting to Google Earth, if this is True and if there's a tracklog currently loaded, a tracklog timeline will be included in the output. GeRenameKmzImagesUsingLowAsciiIf this is True when exporting a KMZ file with embedded images to Google Earth, the images within the KMZ file will be renamed using only 7-bit ASCII characters. The original images will not be changed. You should normally set this to true if your image file names contain extended ASCII characters beyond decimal 127, as are commonly used outside of the USA. GeForceDefaultNoTracklogIf True when exporting to Google Earth, the default values associated with including the tracklog in the output will be unchecked. GeForceDefaultIncludeTracklogIf True when exporting to Google Earth, the default value associated with including the tracklog in the output will be checked while the option to include the trackpoints and the option to combine the tracklog segments will be unchecked. GeForceDefaultStampImagesIf True when exporting to Google Earth, the default value associated with whether to stamp the images will be checked. GeForceDefaultWriteToExifIf True when exporting to Google Earth, the default value associated with whether to write to the EXIF will be selected. GeForceDefaultKmzWithImagesIf True when exporting to Google Earth, the default output will default to KMZ w/images. GeForceDefaultNoPhotoRouteIf True when exporting to Google Earth, the default option to export a photo route will be unchecked. GeForcedMaxScaleWidthIf non-zero, this will be used for the default maximum scale width when exporting either a KML or KMZ file type to Google Earth. When zero, the default will be the last value that you used. GeForcedMaxScaleHeightIf non-zero, this will be used for the default maximum scale height when exporting either a KML or KMZ file type to Google Earth. When zero, the default will be the last value that you used. GeForcedMaxResizeWidthIf non-zero, this will be used for the default maximum resize width when exporting a KMZ w/Images file type to Google Earth. When zero, the default will be the last value that you used. GeForcedMaxResizeHeightIf non-zero, this will be used for the default maximum resize height when exporting a KMZ w/Images file type to Google Earth. When zero, the default will be the last value that you used. GeForcedMaxThumbnailWidthIf non-zero, this will be used for the default maximum thumbnail width when exporting a KMZ for the web file type to Google Earth. When zero, the default will be the last value that you used. GeForcedMaxThumbnailHeightIf non-zero, this will be used for the default maximum thumbnail height when exporting a KMZ for the web file type to Google Earth. When zero, the default will be the last value that you used. GeWarnBeforeStampingImagesIf True a warning will be displayed before images are stamped from the Google Earth Export screen. Note that when you stamp images from there, the original images are always stamped regardless of the EditOriginalImages settings. GeWarnBeforeWritingToExifIf True a warning will be displayed before the EXIF is written to the images from the Google Earth Export screen. Note that when you write to the EXIF from there, the original images are always written to regardless of the EditOriginalImages settings. GeAutoUpdateExifTimestampIf writing to the EXIF when exporting to Google Earth and if the CameraOffset preference setting is non-zero, the current value of CameraOffset will be permanently applied to the EXIF timestamps of the original images and then it will be reset to 0. GeWarnIfEmptyImageTitlesIf True when exporting from Google Earth, you'll be warned if there are any images with blank titles. GeAutoOpenTitleMakerIf True the Title Maker form will automatically load whenever the Export to Google Earth form loads. GeRootCaptionTimeBasedIf True the default root caption for Google Earth output will be of the form YYYYMMDD_rGEO, where YYYYMMDD is per the most recent photo or trackpoint date. If False, the root caption will be what you used last. GeOmitBoundingBoxIf True the bounding box will not be included in the Google Earth output. GeIgnoreImageDirectionsIf True when exporting to Google Earth, the image directions will be ignored. GeIconPlaceUrlWhen exporting to Google Earth from the Place Lookup screen and if GeIconUseLocalPaths is False, this graphic is used for the places placemarks. The default value is http://www.robogeo.com/home/GEMarkers/place.png. GeIconPlaceLocalPath
When exporting to Google Earth from the Place Lookup screen and if GeIconUseLocalPaths is True, this graphic is used for the places placemarks.
GeIconPlaceScaleThis is scale factor that's applied to the Google Earth place icon. Numbers that are smaller than 1 make the icon smaller than normal. Numbers larger than 1 make them bigger. The default is 0.75. GeIconPhotoDirectionUrlWhen exporting to Google Earth and if GeIconUseLocalPaths is False, this graphic is used as the icon for photos that have directions associated with them. The graphic is automatically rotated so that it points in the correct direction. The default value is http://www.robogeo.com/home/GEMarkers/photodirection.png. GeIconPhotoDirectionLocalPath
When exporting to Google Earth and if GeIconUseLocalPaths is True, this graphic is used as the icon for photos that have directions associated with them. The graphic is automatically rotated so that it points in the correct direction. You should not use local paths if you'll be sharing the file with others. If GeIconIncludeInsideKmz is True, the icon is obtained from this location regardless of what the setting is.
GeIconPhotoDirectionScaleThis is scale factor that's applied to the Google Earth photo direction icon. Numbers that are smaller than 1 make the icon smaller than normal. Numbers larger than 1 make them bigger. The default is 0.75. GeIconPhotoPointUrlWhen exporting to Google Earth and if GeIconUseLocalPaths is False, this graphic is used as the icon for photos that do not have directions associated with them. The default value is http://www.robogeo.com/home/GEMarkers/photopoint.png. GeIconPhotoPointLocalPath
When exporting to Google Earth and if GeIconUseLocalPaths is True, this graphic is used as the icon for photos that do not have directions associated with them. You should not use local paths if you'll be sharing the file with others.
GeIconPhotoPointScaleThis is scale factor that's applied to the Google Earth photo point icon. Numbers that are smaller than 1 make the icon smaller than normal. Numbers larger than 1 make them bigger. The default is 0.75. GeIconTrackPointUrlWhen exporting to Google Earth and if GeIconUseLocalPaths is False, this graphic is used as the icon for tracklog trackpoints. The default value is http://www.robogeo.com/home/GEMarkers/trackpoint.png. GeIconTrackPointLocalPath
When exporting to Google Earth and if GeIconUseLocalPaths is True, this graphic is used as the icon for tracklog trackpoints. You should not use local paths if you'll be sharing the file with others.
GeIconTrackPointScaleThis is scale factor that's applied to the Google Earth trackpoint icon. Numbers that are smaller than 1 make the icon smaller than normal. Numbers larger than 1 make them bigger. The default is 0.50. GeIconKeyPointUrlWhen exporting to Google Earth and if GeIconUseLocalPaths is False, this graphic is used as the icon for key points such as the highest elevation, time midpoint, northernmost point, etc. The default value is http://www.robogeo.com/home/GEMarkers/keypoint.png. GeIconKeyPointLocalPath
When exporting to Google Earth and if GeIconUseLocalPaths is True, this graphic is used as the icon for key points such as the lowest elevation, starting point, southernmost point, etc. You should not use local paths if you'll be sharing the file with others.
GeIconKeyPointScaleThis is scale factor that's applied to the Google Earth key point icon. Numbers that are smaller than 1 make the icon smaller than normal. Numbers larger than 1 make them bigger. The default is 1.0. GeIconViewUrlWhen exporting to Google Earth and if GeIconUseLocalPaths is False, this graphic is used as the icon for the various views. The default value is http://www.robogeo.com/home/GEMarkers/view.png. GeIconViewLocalPath
When exporting to Google Earth and if GeIconUseLocalPaths is True, this graphic is used as the icon for the various views. You should not use local paths if you'll be sharing the file with others.
GeIconViewScaleThis is scale factor that's applied to the Google Earth view icon. Numbers that are smaller than 1 make the icon smaller than normal. Numbers larger than 1 make them bigger. The default is 1.0. GeIconUseLocalPathsIf True, the local paths specified by the GeIcon***LocalPath preference settings will be used in the KML file. If False, the URLs specified by the GeIcon***Url preference settings will be used. If you intend to share the file with others, you should not use local paths so this should be False, which is the default value. GeIconIncludeInsideKmzIf True and if exporting a KMZ file, the placemark icons will be stored inside of the KMZ files and will be read from there instead of being retrieved from the URLs associated with the various GeIcon***Url preference settings. The default is False. GeIncludePhotoIconLabelIf True, photo labels will be displayed next to the photo icons. If you want to unclutter the map or if the photo titles are not important, set this to False. The default is True. GeIconPhotoPointLabelScaleThis is scale factor that's applied to the Google Earth photo icon's label. Numbers that are smaller than 1 make the icon smaller than normal. Numbers larger than 1 make them bigger. This is only applied if GeIncludePhotoIconLabel is also set to True. The default is 0.75. GeIncludeTrackPointIconLabelIf True, trackpoint labels will be displayed next to the trackpoint icons. The default is False. GeIconTrackPointLabelScaleThis is scale factor that's applied to the Google Earth trackpoint icon's label. Numbers that are smaller than 1 make the icon smaller than normal. Numbers larger than 1 make them bigger. This is only applied if GeIncludeTrackpointIconLabel is also set to True. The default is 0.75. GeIncludeKeyPointIconLabelIf True, key point labels will be displayed next to the keypoint icons. The deafult is False. GeIconKeyPointLabelScaleThis is scale factor that's applied to the Google Earth key point icon's label. Numbers that are smaller than 1 make the icon smaller than normal. Numbers larger than 1 make them bigger. This is only applied if GeIncludeKeyPointIconLabel is also set to True. The default is 0.75. GeGeocoderHttpPortWhen geocoding photos with Google Earth, this is the port through which all communication occurs. If you encounter problems using the default value or if a 3rd party application on your computer prevents the access, try any arbitrary number between 1024 and 32767. GeGeocoderHttpHostWhen geocoding photos with Google Earth, this is the local host name with which all communication occurs. This should usually be either (without quotes) "127.0.0.1" or "localhost". GeGeocoderAutoAdvanceWhen True and after geocoding a photo in Google Earth, the next image in the set is automatically selected. Setting this to True is equivalent to clicking the Next button after geocoding an image. The default value is True. Normally, this should be True and GeGeocoderAutoAdvanceAfterTitleEdit should be False if you prefer to set an image's title before geocoding it. GeGeocoderAutoAdvanceAfterTitleEditWhen True and after editing an image's title using the Google Earth geocoder, the next image in the set is automatically selected. Setting this to True is equivalent to clicking the Next button after editing the image's title. The default value is False. Normally, this should be False and GeGeocoderAutoAdvance should be True if you prefer to set an image's title before geocoding it. GeGeocoderShowUtcTimeIf True, the Google Earth geocoder will display photo timestamps as UTC time instead of local time. The default is to display local times. GeGeocoderRangeWhen using the Google Earth Geocoder, this is the default altitude. It's expressed in meters. GeGeocoderThumbnailWidthExpressed in pixels, this is the width of the thumbnail image on the Google Earth Geocoder form. The corresponding thumbnail height is automatically calculated to maintain the correct aspect ratio. If it's too small, you won't be able to see the image. If it's too big, you'll obstruct your view of Google Earth. The default is 120 pixels. GeGeocoderIncludeDirectionWhen True and when geocoding images with Google Earth, the current heading in Google Earth is used for the photo direction. The default value is False. GeGeocoderIncludeTracklogIf True and if a tracklog is loaded when geocoding images in Google Earth, the tracklog will be displayed. You may want to set this to False if it slows down Google Earth or if the tracklog isn't needed as a refererece when locating the photos. The default is True. GeGeocoderGePath
If specified, this is used for the path to Google Earth when the Google Earth geocoder is launched. If it's blank (the default), the program automatically determines the path.
GeGeocoderShowStatusInCaptionIf True, the Google Earth Geocoder form's caption will show status information like 'Geocoder - Image 5 of 7'. Otherwise, it'll be simply 'Geocoder'. The default is True. Set to False if you need to use a custom application to programmatically identify the form. GmapHtmlFileNameIf specified, this will be used for the main file name of the Google Maps output. It will also be used for the accompanying XML file. The default is map.htm (and map.xml). You may want to specify something like index.html or default.asp if you don't want to include the file name in the resulting URL. GmapZoomLevel
When -1 (the default), the program automatically determines an optimal initial zoom level for Google Maps based on the coverage of the photos and/or tracklog.
GmapIncludeOverviewIf True, a map overview window is added to the lower right corner of the Google Maps output. GmapIncludeScaleIf True, a small scale is added to the lower left corner of the Google Maps output. GmapIncludeMapTypeButtonsIf True, buttons are added to the upper right corner of the Google Maps output that allows selecting different map types. GmapPanZoomTypeEnter a number that indicates the type of zoom/pan control to use with Google Maps. 0=none, 1=small (zoom only), 2=medium (zoom and pan), 3=large (zoom and pan). GmapEnableScrollWheelZoomIf True, the mouse's scroll wheel can be used to zoom the Google Maps in and out. The default value is False. GmapAddTrafficOverlayIf True, icons are shown over some metropolitan areas that, when clicked, show the current traffic conditions. This option does not add a traffic button to the Google Map, only the icons. The default value is False GmapUseDirectionMarkersIf True (the default) and if direction information exists for an image, custom icons will be used with Google Maps that indicate the photo direction. GmapDictationLinkText
When the 'Include Dictation' box is checked in a Google Earth or Google Maps description, an HTML link is created and added to the description. This option specifies the text that displays for the link.
FlickrDefaultUserSelectUponLoad
If specified and if the Flickr account has been previously authorized, it'll be automatically selected when the Flickr upload form is loaded. Loading the account can take anywhere from a few to several seconds, so be patient.
FlickrGeoAddLocation
If True and when uploading Flickr photos, the photo's location will automatically be added to Flickr's internal database. This will cause the resulting Flickr photo page to contain 'Map' links that allow you to view the photo locations using Yahoo! Maps.
FlickrGeoPublicViewIf both this and the FlickrGeoAddLocation options are set to True, anyone on Flickr will be able to view the location of your photos. FlickrGeoContactsViewIf both this and the FlickrGeoAddLocation options are set to True, only your Flickr contacts will be able to view the location of your photos. FlickrGeoFriendsViewIf both this and the FlickrGeoAddLocation options are set to True, only your Flickr friends will be able to view the location of your photos. FlickrGeoFamilyViewIf both this and the FlickrGeoAddLocation options are set to True, only your Flickr family will be able to view the location of your photos. ShapefileWriteFullPath
If True (the default), the image's full local file path is written to the path field. If False, only the file name is written.
ShapefileLinesFileSuffixWhen exporting line shapefiles, this is appended to the end of the basename when writing the output files. For example, if the basename is 'Shapefile' and this value is '-lines' (the default), the resulting filenames will be Shapefile-lines.shp, Shapefile-lines.shx, and Shapefile-lines.dbf. This value must differ from the ShapefilePointsFileSuffix setting. ShapefilePointsFileSuffixWhen exporting point shapefiles, this is appended to the end of the basename when writing the output files. For example, if the basename is 'Shapefile' and this value is '-points' (the default), the resulting filenames will be Shapefile-points.shp, Shapefile-points.shx, and Shapefile-points.dbf. This value must differ from the ShapefileLinesFileSuffix setting. ReverseGeocodingPreserveExistingKeywordsIf True and when reverse geocoding images using ESRI shapefiles, existing IPTC keywords are preserved when new keywords are written. The default is to preserve them. HtmlExportMaxTableWidthWhen exporting HTML, this is the maximum table width. If you want to generate output that's compatible with mobile devices, set it to 1 to force the output to be a single column of thumbnail images. The default is 736 pixels. HtmlExportMaxThumbnailWidthWhen exporting HTML, this is the maximum thumbnail width. The default is 160 pixels. HtmlExportTableDataPaddingWhen exporting HTML, this is the padding around table data elements. If you want more whitespace in the output, make this larger. The default is 10 pixels. HtmlExportTableBackgroundColorWhen exporting HTML, this is the background color of the thumbnail grid. The default is white (#FFFFFF). HtmlExportBodyBackgroundColorWhen exporting HTML, this is the background color of all areas outside of the thumbnail grid. The default is a very light gray (#F8F8F8). |
|
|
|
|
|
|
|
|
|
|
© 2003-2025 Pretek, Inc.
|